SmartSearch offers user management functionality that allows SmartSearch users to benefit from ‘Admin’ roles.
The ‘Admin’ role has permissions to view, edit, delete, and invite users, including managing archived users.
Adding, Editing and Deleting Users
- Navigate to the ‘Manage’ tab
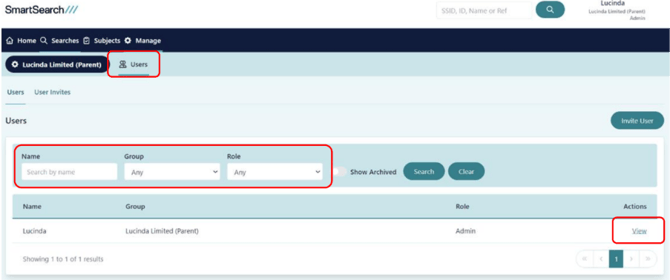
- Search for the desired user
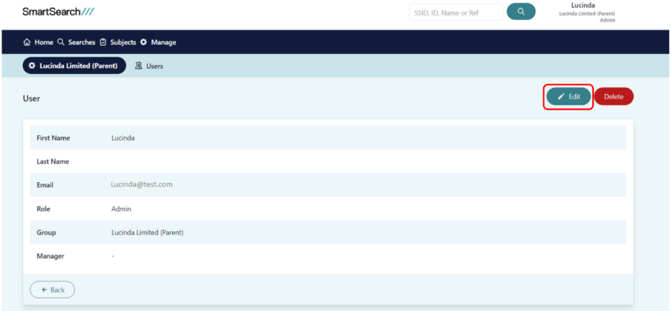
This will load the user’s page.
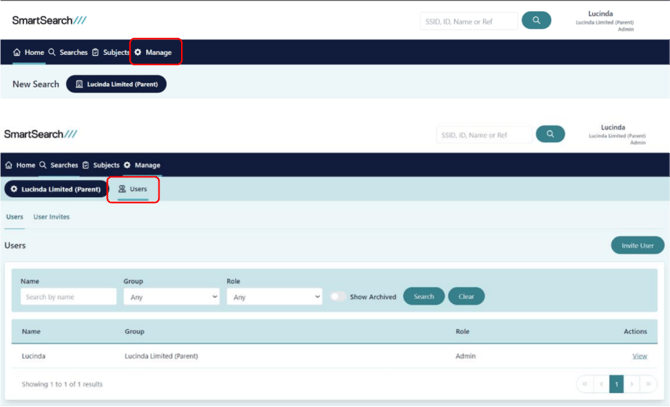
- A user list will display all SmartSearch users from your company. Search the user you would like to manage using their name, group or role and clicking ‘Search’.
- Once you have located the user you’d like to manage, click ‘View’
- Edit User
- Deleting a User
- Click on ‘Invite User’ button on the righthand side of the User tab.
- Populate Fields
- Identifying Users
- User Profile
- Reactivate Account
Click on the edit button to the right-hand side. All fields are editable.
Note: If you edit a user’s email address, a warning will pop up, as below, to ensure that the domain you’ve provided may have access to your SmartSearch account.

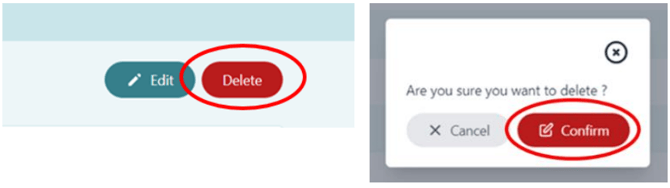
Click on the ‘Delete’ button to the right-hand side. A prompt will appear asking you to confirm the deletion.
Inviting Users
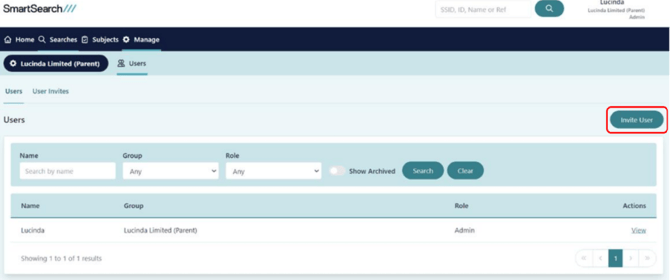
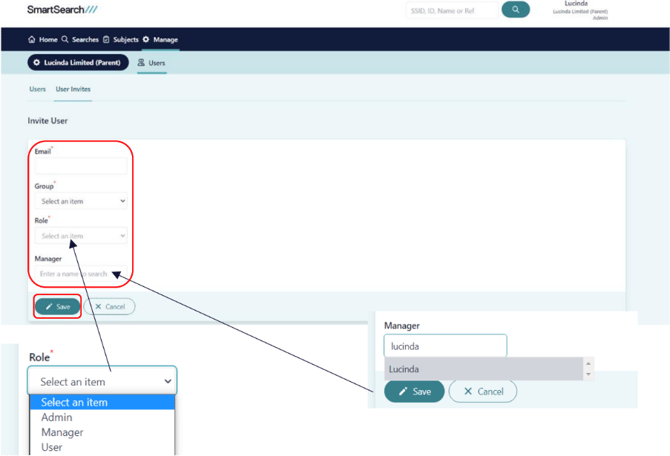
Ensure that at least the mandatory fields marked with a red Asterix* are populated and click ‘Save’. To assign the correct role, please refer to the SmartSearch User Roles & Permissions Matrix.
Viewing and Archived/Deleted Users
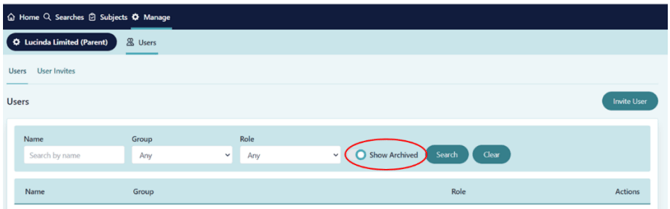
To display archived users, whilst on the Users tab, toggle on the ‘Show Archived’ option and press ‘Search’. This will then bring up a list of Archived/Deleted users.
To unarchive a user, click ‘View’ on the user you wish to unarchive, this will take you to the archived user’s profile.
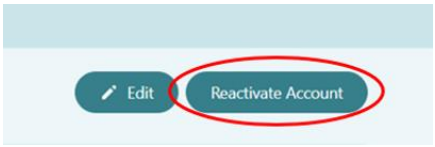
Click ‘Reactivate Account’ to reactivate the user and remove them from the archive list.